Skip to product information
long-shape
1 of 5
4.8
Rated 4.8 out of 5 stars
4.8 Stars (116 Reviews)
THE SIMPLES

Freelance Gig

Freelance Gig

FULLY CUSTOMIZABLE FOR PERFECT FIT
FAST APPLICATION & REMOVAL
REUSABLE & LONG-LASTING
Design: Freelance Gig
Tip Shape: Almond
Almond
No available purchase options for this selection.
Deliver Every
Free Shipping, Always
Save Money On Every Order
Cancel For Free, Anytime

Product Description

Modern press-on nails. Our signature self-care treatment for a chiller you.

Made with high-quality materials, Chill Tips are comfortable and easy to use from start to finish. The included tools allow you to fully customize the tips to your nail, while the gentle, non-damaging glue secures everything in place for results that have the look and feel of a classic gel mani.

Chill Tips are salon-quality nail art that you can do in your chill home or on the go. There's no mess, no wait time, and no smudges, so you have more me-time. 

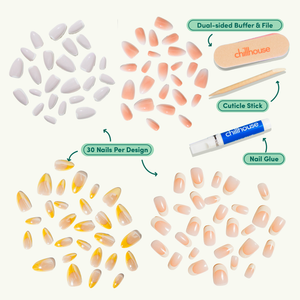
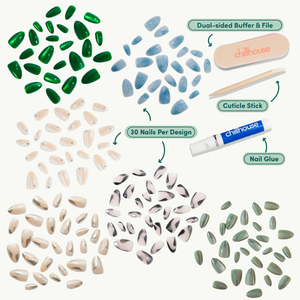
The kit includes:

  • 24 nails to find your perfect fit
  • Dual-sided buffer and file
  • Cuticle stick
  • Gentle glue

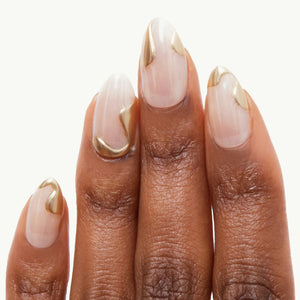
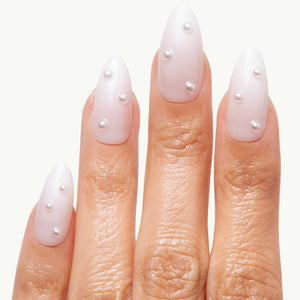
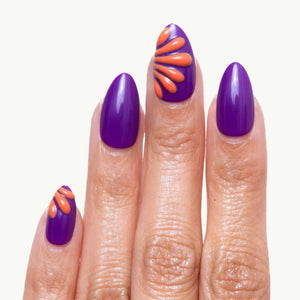
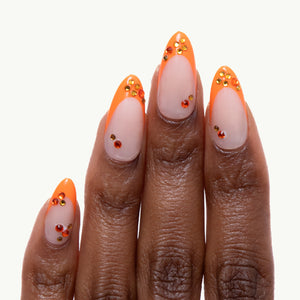
Look at us, we’ve grown! Meet our first ever elongated Chill Tips shape. They’re our signature shape’s sexy, fiercest sister – and we know she’s always down for a Freelance Gig. Whether she’s doing her friend’s wedding makeup or designing visuals for her new client, one thing is for sure: you’ll NEVER catch her with bad nails.No need to commit with Freelance Gig. We get it, you can’t be tied down.

How to Use

APPLICATION:
Begin with bare, natural nails. Treat nails with buffer to increase wear time and press cuticles back to desired shape prior to working with Chill Tips press-on nails.

1. Select desired press-on nail for each finger, ensuring the shape and size align with natural nail. Use file, buffer, and cuticle stick to prep if necessary.
2. Apply a light layer of gentle glue to back of the Chill Tip.
3. Apply a generous amount of gentle nail glue to your natural nail (don’t worry it’s non-damaging!).
4. Wait 3 seconds for glue to activate.
5. Press and hold Chill Tip to natural nail for at least 30 seconds, ensuring equal pressure is applied to entire nail.
6. Perfect shape and feel using nail tools.

Apply enough glue to avoid air pockets for best results. Generous amounts of glue will firmly secure Chill Tip and extend wear time. Use cloth, cotton round, or nail brush to remove excess glue if needed.

REMOVAL:
For our Tips to be 100% reusable we recommend letting them fall off naturally. However, if you’re in a pinch and do not want to reuse your Tips follow the below:

1. Soak hands in warm water with soap to loosen the glue and soften the cuticle.
2. Prep your skin and nails with some kind of oil to loosen the glue from around the edges. Coconut Oil or Olive Oil work great!
3. Once you begin to feel the glue soften, use the little wooden tool provided to get leverage between the nail and the tip and pop the tip off.
4. Wash hands to clear nails of any leftover glue residue and decide which Chill Tips your applying next.

Ingredients

APPLICATION:
Begin with bare, natural nails. Treat nails with buffer to increase wear time and press cuticles back to desired shape prior to working with Chill Tips press-on nails.

1. Select desired press-on nail for each finger, ensuring the shape and size align with natural nail. Use file, buffer, and cuticle stick to prep if necessary.
2. Apply a light layer of gentle glue to back of the Chill Tip.
3. Apply a generous amount of gentle nail glue to your natural nail (don’t worry it’s non-damaging!).
4. Wait 3 seconds for glue to activate.
5. Press and hold Chill Tip to natural nail for at least 30 seconds, ensuring equal pressure is applied to entire nail.
6. Perfect shape and feel using nail tools.

Apply enough glue to avoid air pockets for best results. Generous amounts of glue will firmly secure Chill Tip and extend wear time. Use cloth, cotton round, or nail brush to remove excess glue if needed.

REMOVAL:
For our Tips to be 100% reusable we recommend letting them fall off naturally. However, if you’re in a pinch and do not want to reuse your Tips follow the below:

1. Soak hands in warm water with soap to loosen the glue and soften the cuticle.
2. Prep your skin and nails with some kind of oil to loosen the glue from around the edges. Coconut Oil or Olive Oil work great!
3. Once you begin to feel the glue soften, use the little wooden tool provided to get leverage between the nail and the tip and pop the tip off.
4. Wash hands to clear nails of any leftover glue residue and decide which Chill Tips your applying next.

Awards

Self Magazine Award
Cosmopolitan’s Holy Grail
Hello Giggles

Shipping & Returns

Your order will be shipped within 48 hours from when you place your order. With that being said, sometimes there are slight delays but we try our best to keep fulfillment within this timeframe. See FAQs for more info.

View full details
  • FULLY CUSTOMIZABLE FOR PERFECT FIT

    24 nail shapes and sizes are included in each package to find your perfect fit.

  • FAST APPLICATION & REMOVAL

    Using our medical-grade, gentle nail glue, easily apply your press ons for long-term wear.

  • REUSABLE & LONG-LASTING

    Pop them on, pop them off. Nail glue can hold for up to 3 weeks depending on your application process. When you’re done, keep your tips for multiple uses!

  • ICONIC CHILLHOUSE DESIGNS

    Best of all, each style features iconic designs from NYC’s mecca of nail art and self-care, Chillhouse!

Build Your Own

CHILL TIPS Bundle

You're in control here. Choose your quantity and select your styles. The more you buy, the more you save.

build your bundle

Join the 180,000+ chill Fam Community!

Follow us @chillhouse on Instagram and tag us using #CHILLHOUSE!

4.8
Rated 4.8 out of 5 stars
Based on 116 reviews
Total 5 star reviews: 93 Total 4 star reviews: 21 Total 3 star reviews: 2 Total 2 star reviews: 0 Total 1 star reviews: 0
98%would recommend these products
Customer-uploaded media carousel. Press left and right arrows to navigate. Press space or enter to open more details.
Slide 1 selected
116 reviews
  • C
    Claire
    Verified Buyer
    Going to the Barre
    Reviewing
    Going to the Barre
    I recommend this product
    Rated 5 out of 5 stars
    1 year ago
    Medical professional with her fingers crossed for round 2!

    This round I filed them to be shorter in hopes that my medical based job of moving/lifting/pulling patients won’t pop this set off!! The last set (split the bill) I filed to shape my nails but left length. Fingers crossed!! They look so cute!!

  • A
    Amaka
    Verified Buyer
    90's Supermodel
    Reviewing
    90's Supermodel
    I recommend this product
    Rated 5 out of 5 stars
    1 year ago
    Loveeeee it!

    Love the design and the nails are sturdy!

  • L
    Laina
    Verified Buyer
    Pirouette
    Reviewing
    Pirouette
    I recommend this product
    Rated 5 out of 5 stars
    1 year ago
    So so cute!

    So so cute! They look like I got my nails professionally done. Great quality like all Chillhouse nails and the design is beautiful!

  • S
    Sara
    Verified Buyer
    The Chill Line
    Reviewing
    The Chill Line
    I recommend this product
    Rated 5 out of 5 stars
    1 year ago
    Love them!!!

    10/10 got compliments and no one knew they were press ons! They last a week plus too - with one minor chipping issue. The glue was messy my first time applying but came off after a shower and a nights sleep.

  • E
    Erin
    Verified Buyer
    Pirouette
    Reviewing
    Pirouette
    I recommend this product
    Rated 5 out of 5 stars
    1 year ago
    Amazing!!!

    Amazing!!! I’ve tried other press on nails and these are the best I’ve tried. Will definitely be ordering more :)

Reviews LoadedReviews Added

Apply your new press-ons in a few easy steps.

  • Step one

    PREP

    Prep your nails to apply the tips. Push cuticles back with the little wooden tool provided. Buff and smooth your nails with the file provided in the box.

  • Step two

    SELECT

    Remove Tips from the box and choose which size work best for your hands and nails. Lay them out on the cardboard piece provided.

  • Step three

    GLUE

    Moving from thumb to pinky, apply a small dot of glue to the base of the tip and the finger nail.

  • Step four

    PRESS

    Press firmly for 30 seconds per nail focusing on the edges of nail, this insures that no moisture or bacteria get under the nail.

Subscribe to Our Chill Newsletter

Don't know about you, but our inboxes are crazy, stressful messes. Give them a little chill break from RL. Even better when the messages include chill content, contests and discounts.